7 Tips on Where to Place Panel Lights in an Office Layout?

Time:2026-11-12 Author:Sienna
0%

Choosing where to place panel lights in an office layout is not just a ceiling-grid exercise. It affects desk visibility, screen glare, and the feel of shared spaces. A bright patch over one workstation can leave the next desk dim. Reflections may also cut across a monitor at the wrong angle. Small placement decisions matter.

The U.S. Energy Information Administration’s 2018 Commercial Buildings Energy Consumption Survey attributes about 17% of commercial-building electricity use to lighting. That makes efficient layouts worth careful planning, not guesswork. For visual comfort, EN 12464-1 specifies 500 lux maintained illuminance for typical office reading, writing, and data-processing tasks. The target alone is not enough; distribution matters. Lighting researcher Mariana Figueiro has described light as “a drug,” a reminder that exposure can influence people as well as visibility. Her phrase is brief. Its implications are not.

This guide explains where to place panel lights in an office layout, from open desk rows to meeting tables and circulation paths. It considers ceiling height, daylight from windows, screen positions, and the spacing between fixtures. In practice, furniture plans change, and a tidy lighting grid may not follow them. That is easy to miss. Treat the recommendations as a starting point, then check the actual room with measured light levels and input from a qualified lighting professional.
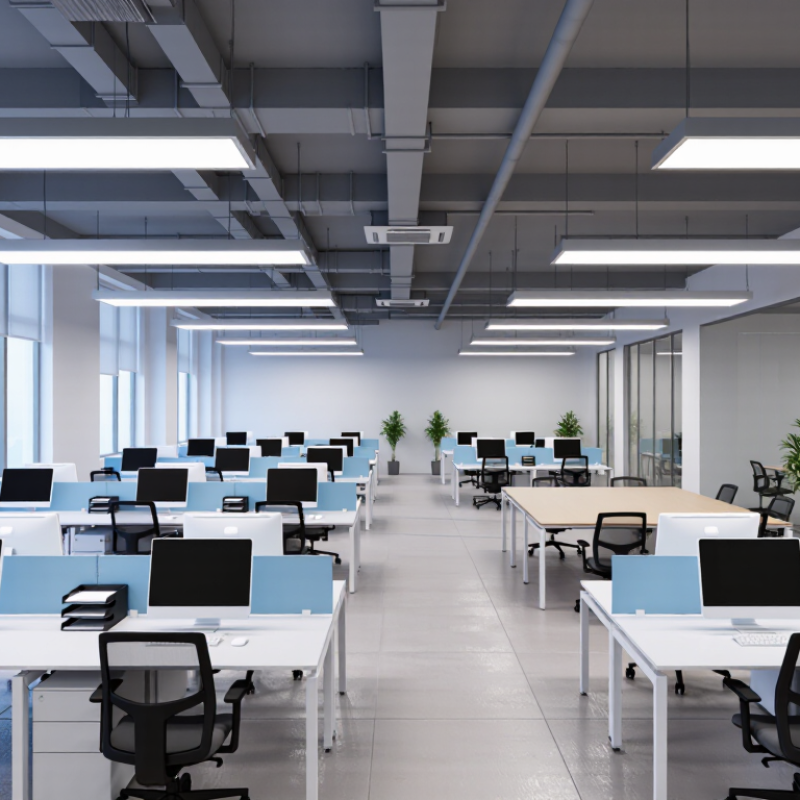
7 Tips on Where to Place Panel Lights in an Office Layout?

Assess Office Tasks, Ceiling Height, and Daylight Before Planning

Before choosing panel-light positions, map the actual work: screens, paper tasks, meeting tables, and circulation paths. EN 12464-1:2021 specifies 500 lux maintained illuminance for office writing, reading, and data processing. Treat this as a task-plane target, not a reason to make every corner equally bright. Check for reflections on monitors and dark patches between fixtures; a quick mock-up often reveals what a floor plan misses.

Daylight changes through the day. Place lights to supplement dim areas, not compete with bright windows, and use blinds or dimming where afternoon sun creates glare. CIBSE’s Office Lighting guidance emphasizes visual comfort and coordination with daylight. Ceiling height matters, too: a high ceiling spreads light over a wider area, while a low one can create harsh pools if panels sit too close together. I still find daylight hard to predict from drawings alone.

Tip: Match locations to tasks. Keep panels aligned across desk rows, but avoid placing a bright fixture directly above a screen. For low ceilings, check spacing and glare at seated eye level. For perimeter desks, compare daylight in morning and afternoon before fixing the layout. Then measure illuminance on the desk surface; adjust if the center is bright but the work edges feel dim.

Place Panels to Distribute Light Evenly Across Workstations

Even light across workstations starts with the furniture plan, not the ceiling grid. Mark desk centers, monitor positions, and shared tables before placing panel lights. Align panels with workstation rows where possible, so each desk receives light from more than one direction. This helps reduce dark patches when someone leans over a keyboard or opens a file.

Keep spacing consistent, but do not force a perfect grid. A column, tall cabinet, or change in ceiling height can interrupt the pattern. In a typical office, panels placed between desk rows can spread light across adjacent work surfaces. Check how the light falls on screens, too. Reflections can make a bright room tiring to use. Small adjustments matter.

Walk the layout at desk height. Look for shadows from monitor arms, shelves, and people seated nearby. A neat drawing is not proof of even lighting. I would verify the plan with a lighting calculation, then check the finished space using a light meter at several workstations. One awkward corner may need a different panel position or supplemental task lighting. Avoid judging by the center of the room alone; edge desks often tell a less comfortable story.

Place Panel Lights to Distribute Light Evenly Across Workstations

Use these illuminance benchmarks to plan panel-light coverage: provide the highest light level at desk tasks, with lower levels in surrounding and background areas.

Benchmarks: 500 lux for office reading, writing, and data processing; 300 lux for the immediate surrounding area; and 100 lux for the background area. These are lighting design targets, not measurements of a specific office. Arrange panels to avoid unevenly lit desks and harsh contrasts.

Source: EN 12464-1, Light and lighting — Lighting of work places — Indoor work places.

Align Fixtures with Desk Rows and Computer Screens

Treat each desk row as a lighting lane, not just a line on a floor plan. Position panel lights parallel to the rows so light reaches work surfaces without creating a bright strip across computer screens. The goal is useful, even illumination—not a fixture directly above every chair. Sit at representative desks and check the screens from normal working positions. Look for reflected panels, especially on glossy displays.

Monitor angles and desk locations vary, so a perfectly regular ceiling grid can still feel uncomfortable. Where possible, keep panels slightly forward or behind the seated eye line rather than directly over the screen. If desks face windows, check the layout at different times of day; daylight can change where glare appears. Small shifts matter. A mock-up with one row of desks can reveal problems before the full ceiling is installed.

After installation, test the lights with screens on and blinds in their usual positions. Check the brightest and dimmest workstations, not only the center of the room. Adjustable output can help when rows serve different tasks, but dimming will not fix a panel reflected straight in a display. I’ve seen tidy layouts look harsh in practice, so leave room to adjust spacing or alignment after staff use the space.

Light Corridors, Meeting Rooms, and Shared Work Areas

Place panel lights to make office routes easy to read, not merely bright. In corridors, align panels along the direction of travel and avoid dark gaps near doors or intersections.

EN 12464-1:2021 gives 100 lux as a maintained illuminance benchmark for corridors, compared with 500 lux for office reading and writing tasks. These figures are useful starting points, not a substitute for checking the room’s surfaces, daylight, and local requirements.

Avoid dark gaps. A bright panel beside a dim doorway can still make a route feel uneven.

Meeting rooms need flexible, comfortable light. A maintained 500 lux benchmark also applies to meeting rooms in EN 12464-1:2021, but screen glare and reflections can undermine that target. Keep panels out of direct sightlines to displays, and consider separate switching for the table and presentation wall.

In shared work areas, place panels to support desk tasks without creating bright reflections on monitors. A mock-up of one desk bay can reveal problems before the layout is repeated.

Check at desk height. A tidy ceiling grid may look balanced on a plan, yet still leave faces shadowed during video calls; that is worth reconsidering before installation.

Reduce Glare with Careful Spacing, Positioning, and Controls

Start by marking desks, screens, whiteboards, and walkways on the plan; the room’s tasks matter more than a neat ceiling grid. Place panels in consistent rows that follow desk rows, rather than scattering them wherever ceiling space appears. Keep bright panel images out of direct screen reflections. Shift fixtures slightly forward or sideways when seated-view checks reveal glare. Use the panel’s photometric data to set spacing and mounting assumptions, not a universal distance copied from another office. Spacing varies.

Choose diffused optics and a comfortable output level, then compare the desk surface with nearby walls and vertical work. Uniformity helps, but excessive brightness can still make a monitor look washed out. Divide lighting into controllable zones, such as window-side desks and interior work areas, and add dimming where daylight changes. Set controls so people can lower output without leaving faces or circulation paths too dim. Test a sample area at seated eye height, with monitors on and blinds in their usual positions. Look again late in the day. That check may expose a flaw the drawing missed; spacing rules are useful, but never quite perfect.

7 Tips on Where to Place Panel Lights in an Office Layout? — Reduce Glare with Careful Spacing, Positioning, and Controls
Tip Office Area Placement Guidance Spacing and Positioning Glare-Reduction Measure Useful Control or Check
1 Open-plan workstations Arrange panels in consistent rows that serve the desk layout, rather than placing fixtures at random across the ceiling. Keep spacing uniform where possible. As an initial planning estimate, consider spacing around 1.0–1.5 times the mounting height above the work plane, then confirm with a lighting calculation. Position fixtures so their brightest viewing angles are not directly in the typical line of sight of seated workers or computer screens. Review a reflected ceiling plan alongside desk and monitor locations; verify illuminance and uniformity with a qualified lighting design.
2 Rows of desks with monitors Coordinate panel rows with workstation rows and monitor orientation. Avoid placing a bright panel directly in front of or behind a screen where it may create reflections. Use a consistent layout across each desk row, adjusting fixture positions when workstation rows or screen directions change. Choose low-glare optics and avoid excessive brightness in the field of view. Screen reflections also depend on monitor tilt and window position. Check representative screens from normal seated positions during commissioning, and adjust fixture layout or screen orientation if reflections remain.
3 Perimeter desks near windows Place panels to provide useful ambient light without competing unnecessarily with daylight entering from the windows. Plan perimeter fixtures in relation to window bays and desk positions; avoid a bright fixture directly adjacent to a bright window if it creates visual imbalance. Use glare-control window treatments where needed and avoid aiming or positioning light sources so they appear as bright reflections on screens. Use daylight-responsive dimming where appropriate, with sensors positioned and commissioned to respond to daylight at the work area.
4 Meeting rooms Distribute panels to light the table and circulation areas evenly, while considering presentation screens and video-call cameras. Center the layout on the room and table rather than relying only on equal spacing from the walls. Avoid placing panels where they create reflections on display screens or harsh facial shadows during video calls. Provide dimming or separately controlled lighting zones so the room can be adapted for meetings, presentations, and general use.
5 Reception and circulation areas Place panels to support clear wayfinding and an even appearance along corridors, entrances, and visitor routes. Maintain a regular rhythm along corridors, while checking transitions at doorways, corners, and changes in ceiling height. Avoid abrupt bright-to-dark transitions and direct views of intense light sources from approach paths. Use occupancy controls in intermittently used spaces where suitable, with time delays set to avoid lights switching off while areas are occupied.
6 Task-focused zones Use panels for general ambient lighting and coordinate them with task lighting at detailed work areas, such as drafting or document review stations. Place ambient panels to limit strong shadows on the work surface; locate task lights according to the user's handedness and task. Balance task and ambient light levels to avoid a very bright work surface surrounded by a noticeably dim space. Provide local task-light controls so users can adjust light for their work without raising the brightness throughout the office.
7 Rooms with varied ceilings or partitions Reassess panel locations whenever ceiling features, tall partitions, shelving, or room functions interrupt the open layout. Check that partitions do not block light from reaching desks and that panels remain appropriately located over occupied work areas. Use suitable diffusing or low-glare fixtures and avoid placing panels so close to occupants that they appear uncomfortably bright. Confirm the final layout against fixture photometric data, applicable local lighting requirements, and an on-site glare and illuminance review.

FAQS

How should panel lights align with desk rows?

Run panels parallel to desk rows. This helps light work surfaces without creating bright strips across screens. Small shifts matter.

How can I check for screen glare?

Sit at representative desks with monitors on. Look for reflected panels from normal working positions. Check glossy displays closely.

Should a light sit directly above each chair?

Not necessarily. Aim for even light on work surfaces, rather than one fixture above every seat. A mock-up can reveal issues early.

What corridor lighting level does the article mention?

It cites 100 lux as a maintained corridor benchmark. Check doorways and intersections for dark gaps, too.

What lighting level is suggested for meeting rooms?

The article gives 500 lux as a maintained benchmark. Keep panels away from display sightlines, and consider separate controls for the table and presentation wall.

How can shared work areas stay comfortable on screens?

Position panels to support desk tasks without reflecting brightly in monitors. Check faces during video calls; shadows can be easy to miss.

Can dimming controls solve screen glare?

Not by themselves. Dimming cannot remove a panel reflected directly in a display. Adjust its position when needed.

When should the lighting layout be tested?

Test a sample desk bay with blinds in their usual positions. Check again late in the day. A neat plan can still feel harsh in practice.

Conclusion

Choosing where to place panel lights in an office layout starts with understanding how each space is used. Consider the tasks employees perform, ceiling height, and the amount of natural daylight before deciding on fixture locations. Arrange panels to spread light evenly across workstations, avoiding overly bright or dim patches. In desk areas, align fixtures with desk rows and consider the direction of computer screens to help limit reflections and visual discomfort.

Lighting plans should also cover corridors, meeting rooms, and shared work areas, with suitable placement for how people move and gather in each space. Careful spacing, positioning, and the use of lighting controls can further reduce glare and make illumination easier to adjust throughout the day. A thoughtful layout creates a more balanced, comfortable office environment while supporting different activities across the workplace.

Sienna

Sienna

Sienna is a skilled marketing professional with a deep expertise in our company’s core products and services. With a passion for innovation and detail, she plays a pivotal role in crafting insightful blog posts that not only highlight the unique features of our offerings but also provide valuable......