How to select dimmable downlights for a home theater begins with one question: where should light fall when the movie starts? Lighting designer Thomas E. Farin is often credited with the line, “Light is the first element of design; without it there is no color, form, or texture.” That idea matters in a theater room, where a bright spot on a screen or a reflection across a glossy wall can distract from the picture. A good plan considers the room, not just the fixture.
Compare dimming performance, beam angle, color quality, and control compatibility before choosing downlights. A narrow beam can create pools of light on seats, while a poorly aimed fitting may cause glare. Check that the LED, driver, and dimmer are designed to work together; otherwise, low settings may flicker or switch off unexpectedly. Test samples in the actual room if possible. Walls, ceiling height, and screen placement change how light feels.
Small details matter. A soft, warm setting can help during a pause, while very low output keeps walkways visible without washing out the screen. Still, there is no perfect specification sheet. A light that looks gentle in a showroom may feel harsh beside a dark screen. This guide explains how to select dimmable downlights for a home theater, with practical checks for placement, dimming, and viewing comfort. The goal is control—not simply darkness.
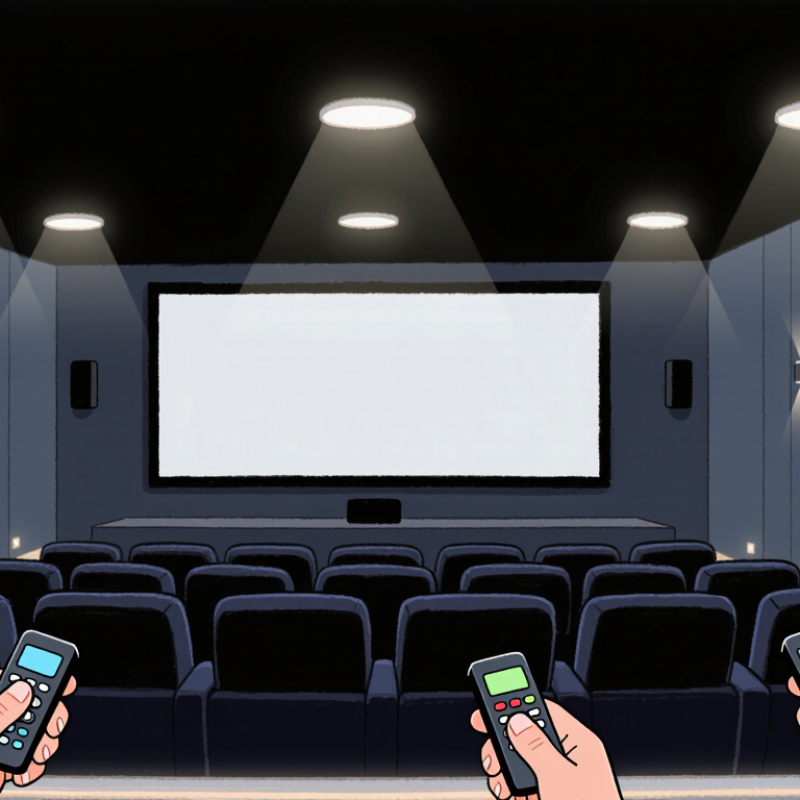
Understanding Dimmable Downlights in Home Theater Lighting
Dimmable downlights control brightness without distracting attention from the screen. In a theater, that control matters during trailers, movie scenes, and cleaning. The U.S. Department of Energy reports that LED lighting uses up to 75% less energy than incandescent lighting. It can also last up to 25 times longer. These figures support LED downlights for frequent evening use.
Choose fixtures with a smooth dimming range, low flicker, and confirmed dimmer compatibility. A 2700K to 3000K color temperature usually feels comfortable against dark walls. For accurate skin tones, look for a high CRI, preferably 90 or above. IES guidance also encourages evaluating color quality beyond CRI, including the TM-30 method. Narrow beams can create bright circles on the ceiling. Wider beams usually produce softer, more even illumination. Keep downlights away from the screen, where reflections can ruin contrast. My practical mistake was treating brightness as the only concern. It was not.
Tips: Test one fixture before buying a full set. Dim it slowly while watching a dark scene. Listen for buzzing. Check for visible flicker through a phone camera, although that test is imperfect. Confirm the dimmer’s minimum-load requirements and the fixture’s rated dimming range. A wall switch may dim smoothly, but some downlights still respond poorly at low levels. Leave a little flexibility in the layout. Theater seating may change.
Selecting dimmable downlights for a home theater starts with the beam angle. A narrow 24–36-degree beam can highlight seating without flooding the screen with light. Wider beams may suit low ceilings or wall-washing, but they can create distracting reflections. Position fixtures beside seating rows, not directly above the screen. A practical test uses a temporary lamp before cutting the ceiling. Test before cutting.
Color temperature strongly affects the room’s mood and image quality. Choose 2700K to 3000K for a warm, relaxed atmosphere during movie nights. Cooler light can make skin tones and dark scenes feel harsh. I once preferred 3000K everywhere, but a smaller room looked more comfortable at 2700K. Room finishes matter. Dark walls absorb light, while pale ceilings increase perceived brightness. High color rendering, preferably above 90 CRI, helps preserve natural colors during casual viewing and cleaning.
Brightness should support movement without competing with the projector. Calculate the room’s total lumens, then select fixtures with smooth dimming below 10 percent. Some drivers flicker or switch off at low levels, even when labeled dimmable. Check compatibility between the dimmer and driver, and test the lowest setting in the actual room. Keep pathways slightly brighter than the screen area. During installation, leave separate control zones for seats, side aisles, and the entrance. I still find that planned brightness can feel excessive after dark carpeting is installed. Recheck it at night.
How to Select Dimmable Downlights for a Home Theater?
A home theater needs smooth, quiet dimming. Compatibility matters more than maximum brightness. Check the downlight’s driver before choosing a dimmer. The driver converts mains power for the LED module. Its input must match the dimmer’s control method. Common methods include trailing-edge, leading-edge, and 0–10V control. Never assume every LED downlight works with every wall control.
The U.S. Department of Energy reports that LED lighting can use at least 75% less energy than incandescent lighting. However, efficient lighting may still flicker, buzz, or drop out when poorly matched. Check the driver’s minimum load, maximum load, voltage range, and approved dimming protocol. Then compare those details with the dimmer’s technical sheet. IEC 60929 also provides requirements for electronic controlgear used with fluorescent and LED-related systems. A qualified electrician should confirm wiring and phase compatibility. A perfect match on paper can still behave poorly in a dark room.
Tips: Test one complete downlight, driver, and dimmer together before installation. Dim it from full output to the lowest setting. Watch for visible flicker through a phone camera. Listen near the ceiling for buzzing. Keep cable runs neat, and avoid mixing drivers with different dimming methods. I would not skip this test. Small compatibility mistakes become obvious during quiet film scenes.
| Selection Dimension | Typical Requirement | What to Check on the Downlight or Driver | What to Check on the Dimmer | Compatibility Result | Pre-Installation Action |
|---|---|---|---|---|---|
| Electrical Compatibility | |||||
| Input voltage | Match the local supply, such as 120 V AC or 230 V AC. | Confirm the driver input range includes the measured supply voltage and frequency, for example, 220–240 V AC, 50 Hz. | Confirm the dimmer is rated for the same supply voltage and frequency. | Required match | Measure the circuit voltage before installation. |
| Total connected load | For example, 8 downlights × 9 W = 72 W LED load. | Use the driver input wattage where available, rather than relying only on the LED module wattage. | Check the dimmer's LED load range. A 72 W load is approximately 0.60 A at 120 V or 0.31 A at 230 V, excluding power-factor effects. | Verify rating | Calculate the total load for every lighting zone. |
| Dimmer minimum load | The connected load must be above the dimmer's specified minimum LED load. | Check whether the driver requires a minimum phase-cut current or load. | Compare the actual connected load with the dimmer's minimum and maximum LED ratings. | Critical check | Do not assume a higher wattage dimmer will work with a very small LED load. |
| Dimmer maximum load | Keep the connected LED load within the dimmer's LED rating. | Use the driver's rated input power for load calculations. | Follow the manufacturer's derating guidance, especially when several dimmers share an enclosure or when ambient temperature is high. | Within rating | Leave design margin instead of operating continuously at the limit. |
| Dimming method | Use the same control method for the driver and dimmer. | Identify whether the driver supports leading-edge, trailing-edge, 0–10 V, or DALI control. | A phase-cut dimmer cannot directly control a driver designed only for 0–10 V or DALI input. | Do not mix methods | Match the control technology before purchasing components. |
| Phase-cut type | Trailing-edge control is often suitable for many electronic LED drivers, but compatibility must be confirmed. | Check whether the driver specifies trailing-edge, leading-edge, or universal phase-cut operation. | Use a dimmer supporting the driver's approved phase-cut mode. Leading-edge control may produce more inrush, noise, or unstable low-level dimming with some electronic drivers. | Driver-specific | Use the driver and dimmer compatibility list when available. |
| Neutral conductor | Some dimmers require a neutral wire; others are designed for no-neutral installation. | Confirm the driver wiring diagram and whether it requires line, neutral, and earth connections. | Verify the dimmer's wiring type and minimum load requirements for no-neutral operation. | Wiring check | Inspect the wall box and ceiling junction box before selecting the dimmer. |
| Home Theater Performance | |||||
| Minimum dimming level | A practical target is stable operation from approximately 10% down to 1%, depending on the system. | Check the driver's specified dimming range and whether it turns off or flickers near the bottom of the range. | Check for adjustable low-end trim and a published minimum output level. | Test required | Test the lowest setting in a dark room before final installation. |
| Flicker and modulation | Use lighting with low visible flicker for comfortable viewing and camera use. | Request flicker data when available, such as percent flicker or flicker index at several dimming levels. | Confirm the dimmer does not introduce visible instability, especially at low output. | Prefer low flicker | Check the lights through a smartphone camera and observe them at 1%, 10%, 50%, and 100% output. |
| Color consistency while dimming | Color temperature should remain visually consistent throughout the dimming range. | Confirm whether the light uses fixed-white or tunable-white technology and whether color shift is specified. | Use a compatible controller for tunable-white products; a standard phase-cut dimmer only controls brightness unless stated otherwise. | Confirm behavior | Compare the light at viewing, cleaning, and full-output levels. |
| Color rendering | Choose a color rendering index of at least 90 for natural skin tones, furnishings, and screen-adjacent areas. | Check the published CRI value and R9 value when available. | The dimmer should maintain stable operation across the selected range. | CRI 90+ preferred | Use a consistent color specification throughout the theater. |
| Color temperature | Warm-white light around 2700–3000 K is commonly comfortable for a home theater. | Confirm the nominal color temperature and tolerance. | Confirm the dimmer does not change color temperature unless the product is designed to do so. | 2700–3000 K | Keep decorative and aisle lighting within the same visual color family. |
| Acoustic noise | Choose components that remain silent from the main seating position. | Check for driver buzzing or coil noise at low and mid-level dimming. | Listen for dimmer buzz under the actual load; electronic noise can vary with the selected dimming mode. | Listen-test | Run a quiet-room test with the projector and sound system switched off. |
| Installation and Verification | |||||
| Heat and clearance | Maintain the clearances specified for the luminaire and driver. | Check insulation-contact, IC-rating, ventilation, and driver ambient-temperature requirements. | Ensure the dimmer is installed within its permitted ambient-temperature range. | Follow clearance data | Do not cover a driver or recessed fitting beyond its approved installation method. |
| Multiple fixtures on one dimmer | All drivers should use the same approved dimming method and have similar electrical behavior. | Confirm the driver is approved for multi-fixture operation and check its inrush current if documented. | Check the dimmer's maximum number of LED fixtures, not only its wattage rating. | System check | Test the complete group together, including the lowest brightness setting. |
| Control location and zoning | Separate screen-wash, seating, aisle, and entry lighting when possible. | Use drivers compatible with the control system assigned to each zone. | Confirm each dimmer channel is independently rated and wired for its zone. | Zone separately | Keep screen-adjacent lights on a separate low-level control. |
| Final functional test | Every fixture should start, dim smoothly, remain stable, and switch off completely. | Check startup, low-end dimming, full output, flicker, color consistency, and audible noise. | Adjust low-end and high-end trim only within the permitted operating range. | Pass before closing | Complete the test with all fixtures installed and connected. |
| Note: Electrical ratings, minimum loads, dimming ranges, wiring requirements, and fixture clearances vary by product. Always compare the exact driver and dimmer model specifications and comply with local electrical regulations. | |||||
Choosing dimmable downlights for a home theater involves more than checking lumen output. Screen reflections often begin with poor placement, not excessive brightness. I recommend testing the room with the projector running before cutting ceiling holes. Sit in the main viewing seats. Ask a helper to move a temporary light across the ceiling. If a bright patch appears on the screen, relocate the fitting. This simple test reveals problems that drawings can miss.
Keep downlights outside the screen’s direct reflection zone. A practical starting point places the first row behind the viewing position, rather than directly above the screen. Avoid aligning fittings with the screen surface and viewers’ eyes. Use narrow beam angles for aisles and wider beams for rear seating. Shielded or deep-recessed trims can reduce visible glare. Dark, matte ceiling finishes also help, although they cannot correct badly aimed light.
Select fixtures that dim smoothly at low levels, because theater scenes may need minimal ambient light. Check compatibility between the dimmer, driver, and control system before installation. Flicker can become noticeable during slow brightness changes. Warm light around 2700K to 3000K usually feels comfortable, but wall colors may alter the result. Leave access for later adjustment. Even careful plans can fail when furniture moves, so confirm sightlines after the seating arrives. The room may need compromise.
Choosing dimmable downlights for a home theater requires more than checking brightness ratings. The lighting system must support clear images, safe movement, and comfortable viewing. Select fixtures with smooth dimming across a wide range. Flicker can become distracting during quiet scenes. Check compatibility between the downlights, dimmer, and control system before installation.
Test the lights after the screen, seating, and curtains are in place. Surfaces change how light spreads. Stand in the rear seats and watch for reflections on the screen. Lower the front lights until the image looks deep, then keep aisle lighting slightly brighter for safe movement. I once adjusted lights too quickly and missed a pale reflection near the screen. Small mistakes matter. Let the system run for thirty minutes, then check heat, noise, and uneven brightness.
Tips: Keep a simple lighting log. Record dimmer levels for movie watching, cleaning, and emergency access. Inspect connections and controls every few months. Dust the trim with a dry, soft cloth, but switch power off first. Replace damaged components promptly. If lights flicker, buzz, or respond slowly, stop repeated testing and ask a qualified electrician to inspect the circuit. Wireless controls can lose settings, so test backup controls occasionally. Perfect lighting is difficult; careful observation usually improves it.
A 24–36-degree beam can light seating without spilling much light onto the screen. Test the position before cutting.
Keep fixtures away from the screen’s direct reflection zone and viewers’ sightlines. Try a temporary light while the projector is on. Test before cutting.
Warm light around 2700K to 3000K often feels relaxed. Dark walls can absorb light, while a pale ceiling may make it seem brighter.
Provide enough light for safe movement, but keep the screen area dimmer. Set separate controls for seating, aisles, and the entrance. Recheck after dark.
Match the dimmer’s control method and load range to the downlight driver. Test one complete setup from full brightness to its lowest setting. Listen closely.
Look for flicker, buzzing, or lights that switch off. A phone camera may reveal some flicker, but it is not a perfect test.
Yes. Dark carpeting can make planned brightness feel excessive, while pale surfaces can reflect more light. I would check again after furnishing the room.
Yes. Test one downlight, driver, and dimmer together before installation. Even a good plan can fail in the actual room. The room may need compromise.
Choosing the right lighting is essential for creating a comfortable, immersive home theater. This guide explains how to select dimmable downlights for a home theater by considering beam angle, color temperature, and brightness. A suitable beam angle helps distribute light evenly, while a warm color temperature can create a relaxed cinematic atmosphere. Adjustable brightness also allows the room to shift easily from viewing mode to cleaning, seating, or social activities.
Before installation, check that the dimmer, LED driver, and downlights are fully compatible to prevent flickering, buzzing, or limited dimming performance. Plan each fixture’s placement carefully to minimize glare and avoid reflections on the screen, especially near seating areas and viewing angles. After installation, test the system at different brightness levels, make adjustments as needed, and regularly inspect the lights and controls. Proper planning, testing, and maintenance will help deliver reliable performance and an enjoyable theater experience.

Dorde Lights