Installing recessed downlights in a concrete ceiling takes more planning than fitting lights into plasterboard. Concrete is unforgiving. A misplaced cut can expose reinforcement, damage hidden services, or weaken an important section. This guide explains how to install recessed downlights in a concrete ceiling while keeping safety, ceiling structure, and lighting performance in view.
Before choosing a drill or cutting tool, identify the ceiling type and check for pipes, cables, and reinforcement. A suitable scanner can help, but it cannot guarantee that every obstruction will be found. If the building plans are available, review them too. When the slab’s structure is uncertain, ask a qualified structural professional before drilling. Electrical connections should be assessed and completed by a licensed electrician, in accordance with local requirements. Small details matter, including the fitting’s required clearance, driver location, insulation rating, and access for future maintenance.
The right installation method depends on the downlight, slab depth, and available ceiling space. Some projects use purpose-designed surface-mounted fittings or shallow fixtures rather than cutting deep openings into concrete. That may not look like the original plan. Still, changing the design is better than forcing a fitting into an unsuitable space. This guide outlines the decisions to make, tools and checks to consider, and common mistakes to avoid. Treat it as practical guidance, not a substitute for site inspection or professional advice. A careful layout, a clean test hole, and a pause when something feels uncertain can prevent expensive repairs later. Concrete rarely gives a second chance.
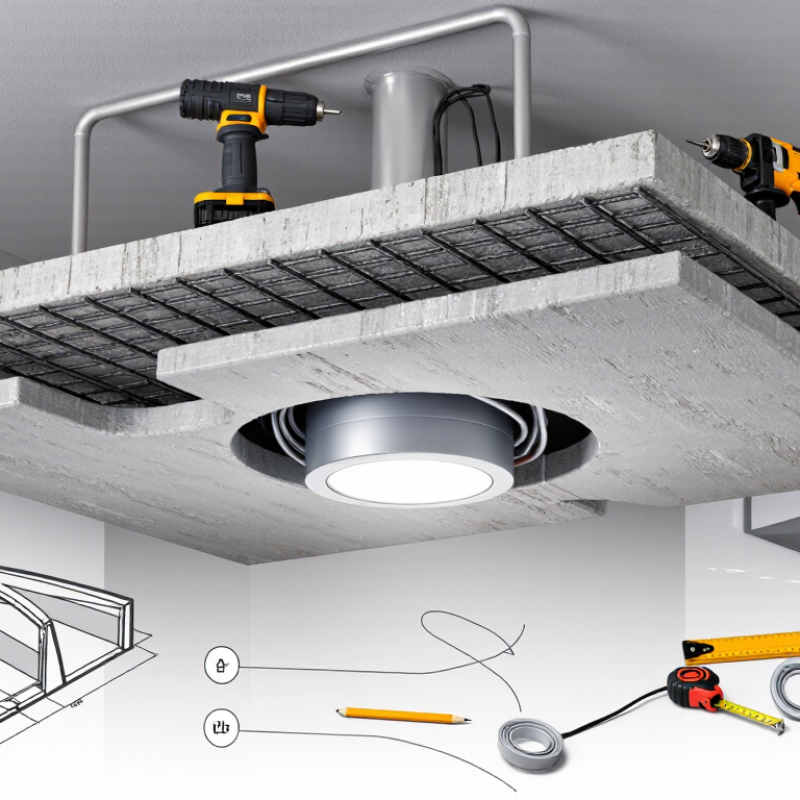
Before choosing recessed downlights, inspect the concrete ceiling’s condition and construction. Look for cracks, water staining, exposed reinforcement, and previous repairs. Concrete is not uniform. A hollow-sounding patch or loose surface may signal a problem that needs professional assessment before drilling. Confirm the ceiling’s thickness and identify pipes, wiring, and embedded services with suitable detection equipment. Never assume a clear-looking spot is safe to cut.
Tips: Mark each proposed light position, then check the layout against joists, beams, and room use. Keep openings clear of detected services. Measure the available ceiling depth and compare it with the fitting’s required clearance, including space for heat dissipation. Small details matter.
Also assess how the lights will be powered and accessed. Concrete ceilings can make cable routes and future repairs difficult, so plan these before work begins. Check whether the chosen fittings suit the ceiling assembly and any insulation or fire-performance requirements. Ask a qualified electrician to verify the circuit, connections, and installation method. Dust control and eye protection are essential during drilling. One detail is easy to miss: a neat hole does not prove the concrete remains structurally sound. If the ceiling’s composition is uncertain, pause and get it checked.
Concrete strength-class reference values under EN 206. These values describe characteristic compressive strength at 28 days; they do not determine whether or where a ceiling can be drilled. Check structural drawings and scan for reinforcement and embedded services before cutting.
Planning downlight locations in a concrete ceiling starts with the room, not a perfect grid. Mark furniture, work surfaces, door swings, and tall cabinets on a scaled plan. A light directly above a cabinet may create a hard shadow. Keep fittings clear of beams and check ceiling plans before choosing positions. Small adjustments matter.
Concrete leaves little room for hidden changes. Have a qualified electrician and structural professional check the slab, reinforcement, and existing services before drilling or cutting. Never assume a clear spot from the surface alone. Use suitable scanning equipment, and route cables through approved conduit or planned ceiling voids where possible. Confirm junction boxes remain accessible and circuit capacity suits the proposed lights. Local electrical requirements also affect the layout.
A common site lesson: the neatest spacing can still feel wrong. Test the arrangement with temporary marks, then review it at night and beside actual furniture. A 30-centimetre shift may reduce glare on a screen or brighten a countertop. Plans do change. Record final fitting centres and cable routes before work begins, so later repairs do not become guesswork.
Choosing a downlight for concrete starts with the ceiling build-up, not the trim color. Many solid slabs offer little or no cavity for a conventional recessed housing. Check slab thickness, ceiling void depth, insulation, and the fitting’s clearance requirements before ordering. A shallow-profile fixture may work, but confirm its cutout size and driver access using the technical sheet. The U.S. Department of Energy’s Energy Saver guidance says LED bulbs can use up to 90% less energy and last up to 25 times longer than incandescent bulbs. That is a broad lamp comparison, not a performance guarantee for every downlight. The International Energy Agency’s 2023 Global Status Report for Buildings and Construction estimates that building operations account for 30% of global final energy consumption.
Before marking positions, review structural drawings and scan proposed drilling zones for reinforcement, cables, pipes, or post-tensioning. Never assume a clear-looking patch is empty. Measure twice. Keep fittings clear of beams, and plan access to drivers and connection points. Check dimmer compatibility, color temperature, beam angle, and insulation-contact suitability. Concrete ceilings can make later repairs awkward. I learned that the hard way: a fitting that looks neat on paper may leave no practical route to its driver. If the slab needs cutting, have a qualified professional assess the location and installation method before work begins.
Creating a recess in a concrete ceiling takes more planning than cutting a neat circle. Confirm the slab depth, reinforcement layout, and location of wiring or pipes before marking each opening. A scan by a qualified professional can help identify hidden services and steel. Never cut reinforcement or tensioning tendons without an engineer’s assessment. Concrete dust travels far, so isolate the work area and use suitable extraction and protective equipment.
Use a core drill sized to the downlight’s specified cutout, not merely the visible trim diameter. Test the position with a cardboard template; even a small shift can make a row look uneven. Keep the recess shallow enough to preserve the slab, while allowing the housing and required clearances to fit. Check the fixture’s installation instructions for insulation, ventilation, and heat requirements. This detail is easy to overlook.
Seat the housing squarely in the opening and secure it with its designed clips, brackets, or approved fixing method. The trim should sit flush without being forced against chipped concrete. If the opening is oversized, stop and choose a suitable repair or mounting solution rather than relying on improvised adhesive. Check that the housing does not move when gently pressed. A little concrete crumbling is frustrating, and it is a sign to reassess the cut before installing the remaining lights.
Connecting recessed downlights in a concrete ceiling requires careful attention to the wiring path, driver location, and access for future maintenance. Before energizing the circuit, a qualified electrician should confirm that conductors are protected from sharp concrete edges and that each connection sits in an approved, accessible enclosure. Check the fixture’s concrete-ceiling suitability and required clearances; a tight cavity can trap heat. Small details matter.
Testing should verify protective-earth continuity, correct polarity, insulation resistance, and secure terminations using instruments appropriate to the installation. Then energize the circuit and check every light for steady operation, unusual noise, flicker, or excessive heat. Record test results and inspect the finished openings for damaged insulation, loose trim, and visible gaps. One missed connection can be hard to spot once the ceiling is closed.
The risk deserves attention: NFPA’s Home Electrical Fires report estimates that U.S. fire departments responded to an average of 46,700 home structure fires involving electrical failure or malfunction each year from 2015 to 2019. That figure does not isolate recessed lighting, but it reinforces the value of documented checks rather than a quick switch-on test. If something feels off, pause and investigate; even a neat-looking installation can hide a poor termination.
Look for cracks, water stains, exposed reinforcement, loose patches, and old repairs. A hollow-sounding area needs assessment.
Use suitable detection equipment to locate pipes, wiring, and embedded services. Never rely on a clear-looking surface. Small detail, big consequence.
Measure the available depth and compare it with the fitting’s clearance requirements. Leave room for heat to escape.
Pause and ask a qualified professional to assess the area. Hollow or loose concrete may signal a problem.
Plan cable routes, driver locations, and future access before work starts. Repairs in concrete can be awkward.
A qualified electrician should check the circuit, wiring protection, enclosures, and fitting suitability. Hidden details are easy to miss.
Check protective-earth continuity, polarity, insulation resistance, and secure terminations with suitable instruments. Then check for flicker, noise, or excess heat.
Look for damaged insulation, loose trim, and visible gaps. Record test results. A tidy finish alone proves little.
This guide explains how to install recessed downlights in a concrete ceiling, starting with an assessment of the ceiling’s structure, thickness, and condition. Before work begins, confirm that the proposed recesses will not interfere with reinforcement, pipes, or other services, and determine whether the project requires specialist assessment. Plan the light positions and electrical routes carefully, considering room use, spacing, access, and the safest way to bring power to each fixture.
Next, choose downlights and housings suitable for the ceiling and prepare the work area with appropriate tools and protective measures. Create each recess to the required dimensions without compromising the concrete, then secure the housings according to their installation requirements. Complete the electrical connections with the power isolated, and have a qualified electrician handle or inspect wiring where needed. Finally, test each light, check that the housings and fittings are secure, and inspect the finished installation for consistent alignment, safe clearances, and reliable operation.

Dorde Lights