How to Choose the Right Downlight Beam Angle from China?

Time:2026-11-05 Author:Isabella
0%

Choosing a downlight beam angle is not just a matter of picking a number from a catalogue. It determines whether a kitchen counter is evenly lit, a hallway feels welcoming, or a display loses its detail in shadow. When sourcing from China, compare the beam angle alongside lumen output, ceiling height, cut-out size, and the room’s purpose. A narrow beam can create a focused pool of light. A wider beam spreads illumination, but may produce glare or overlap if fixtures sit too close together. Small details matter.

Lighting designer Richard Kelly’s framework of “ambient luminescence, focal glow, and play of brilliants” offers a useful way to think about what light should do. Beam angle helps shape those effects, though it cannot do the job alone. For example, a 36-degree beam may suit a living-room accent, while a wider option may work better for general illumination. Treat these as starting points, not fixed rules. Product labels and test conditions can vary between manufacturers, so request a photometric file and verify the sample before placing a large order. The practical question is how to choose the right beam angle for downlights in your actual space—not simply which angle looks best on a specification sheet. Even careful planning can miss a dark corner. A mock-up often reveals it.
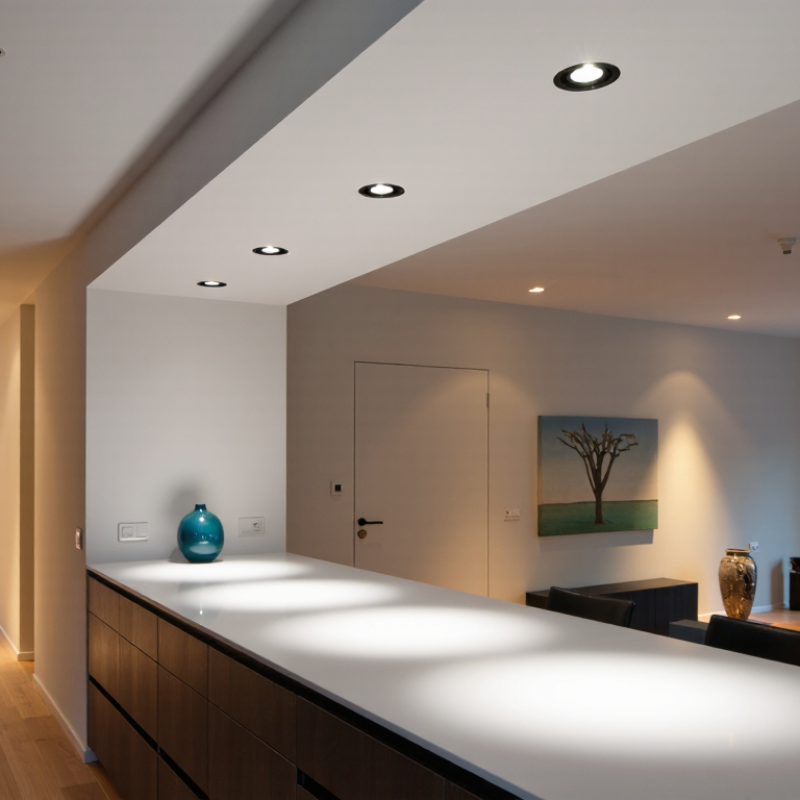
How to Choose the Right Downlight Beam Angle from China?

Define Beam Angle Using the 50% Peak-Intensity Measurement

How to Choose the Right Downlight Beam Angle from China?

Define Beam Angle Using the 50% Peak-Intensity Measurement

Beam angle is the full width of light between the two directions where intensity falls to 50% of its peak. This is not the edge of all visible light. It is a consistent measurement point. For example, a luminaire peaking at 1,000 cd reaches the threshold at 500 cd. If those points fall at 30° on either side of the beam axis, its beam angle is 60°. IEC 61341:2011 describes measurement of centre-beam intensity and beam angle for reflector lamps. For solid-state lighting products, IES LM-79-19 outlines photometric measurement methods. Check the test report’s scope and method; standards may not apply identically to every integrated downlight.

When comparing products from China, request the photometric file or goniophotometric test report, not just a catalogue number. Look for the peak intensity and the angles at the 50% points. An asymmetric distribution can have different left and right boundaries, so compare the measured spread rather than assuming symmetry. I would not choose from beam angle alone. Ceiling height, spacing, trim, and reflector design can change the pool of light on a desk or floor. Small details matter.

Tips: Ask for the test distance, measurement method, and intensity curve. Verify the beam angle in the report. Then assess a sample in the intended room; a neat spec sheet cannot show every real-world effect.

Classify Beam Spreads: Narrow <20°, Medium 20°–40°, Wide >40°

Beam angle describes how widely a downlight spreads its light. Narrow beams below 20° create concentrated pools, useful for highlighting artwork, a kitchen island, or a textured wall. At a 2.7-metre ceiling, the lit circle stays relatively small, so spacing matters. Too far apart, and dark gaps can appear.

Medium beams from 20° to 40° suit general room lighting. They balance focused illumination with broader coverage, often working well in bedrooms, hallways, and living areas. For example, a 30° beam can light a counter without spreading as much onto nearby cabinets. Check the fixture’s photometric data, though; two downlights with the same stated angle may still look different. That detail matters.

Wide beams above 40° spread light across larger areas, making them useful for low ceilings or open rooms. They can soften bright spots, but may send light onto walls or into someone’s eyes when placement is careless. Mock up one fitting before ordering a full set. Measure the ceiling height and spacing, then observe the result after dark. The angle categories are helpful, not strict rules; room finishes and lens design can change the effect. Sometimes the first layout needs adjusting.

How to Choose the Right Downlight Beam Angle

Beam spread classifications with representative example angles

Narrow beams (<20°) concentrate light for accents; medium beams (20°–40°) suit general-purpose lighting; and wide beams (>40°) spread light over a broader area. The plotted angles—15°, 30°, and 60°—are illustrative examples, not measured product data.

Match Beam Angle to Ceiling Height and Target Illuminance in Lux

How to Choose the Right Downlight Beam Angle from China?

Beam angle controls spread, not illuminance by itself. A useful estimate is

Beam diameter = 2 × mounting height × tan(beam angle ÷ 2).

At a 2.7-metre ceiling, a 36-degree beam covers roughly 1.75 metres across the floor. A 24-degree beam covers about 1.15 metres. Wider spacing can leave dim patches; closer spacing improves overlap but may waste light. That matters. Treat these figures as a starting point, not a promise: wall colour, furniture, and optic design all change the result.

Set the target illuminance before choosing the optic. EN 12464-1:2021 specifies 500 lux maintained illuminance for office writing, typing, reading, and data processing; office circulation areas typically require 100 lux. For a desk, a narrower beam may concentrate light, but check uniformity and glare. In a corridor, broader beams and closer spacing can reduce dark gaps. Ask for the luminaire’s IES LM-79 photometric test report, then compare its measured output and distribution with your ceiling height and layout. I would still verify lux on site; real rooms rarely match the drawing exactly.

Estimate Beam Diameter: 2 × Mounting Height × tan(Beam Angle ÷ 2)

A downlight beam angle describes how widely light spreads from the fitting. To estimate the beam diameter on a surface, use: 2 × mounting height × tan(beam angle ÷ 2). Measure mounting height from the light source to the target plane, such as a desk or floor. Keep the units consistent. This gives a useful estimate, not a perfect boundary.

For example, a downlight mounted 3 metres above a floor with a 60-degree beam angle produces an estimated diameter of about 3.46 metres. A narrower 36-degree beam at the same height covers about 1.95 metres. The difference matters over a kitchen island or narrow hallway. Still, the calculation can be easy to misread: manufacturers may define beam edges differently, and the beam does not stop sharply at its calculated diameter.

When comparing downlights from China, ask for the beam angle and a photometric distribution file, not just a product photo. Check the intended mounting height and surface, then compare the expected overlap between fittings. Pale walls may reflect more light than dark finishes. Shelves, ceiling height, and furniture can also change the result. The formula is a sound starting point, but a small mock-up can reveal issues the numbers miss.

Check China-Made Downlights with IES or LDT Photometric Files

How to Choose the Right Downlight Beam Angle from China?

A beam angle printed on a product sheet is only a starting point. Ask the supplier for the IES or LDT photometric file for the exact downlight, including its optic and output. These files describe how light spreads, helping designers estimate illuminance, spacing, and overlap in lighting software. A 36-degree beam may suit a kitchen counter, while a wider beam can soften light across a hallway. Room dimensions and mounting height matter. So does the ceiling finish.

Open the file in a compatible lighting program and check the distribution curve, centre-beam intensity, and glare indicators. Compare the results with the intended task, not just the catalogue image. Confirm that the file matches the quoted wattage, colour temperature, and trim. Small differences matter. Some files may be missing details or represent a different configuration; request clarification, and compare a sample if the project is sensitive. A calculation is useful, but it is not a substitute for checking the installed light.

Tips: Share a simple room plan, ceiling height, and target lux with the supplier. Request the original IES or LDT file, then verify its model code against the quotation. Keep the file version on record. A quick sample test can reveal reflections or dark patches that software does not fully capture.

FAQS

What does beam angle measure?

It measures the full spread between the two directions where light intensity falls to half its peak.

How is a 60-degree beam angle calculated?

If peak intensity is 1,000 candela, the half-peak level is 500. If that level occurs 30 degrees from the axis on each side, the beam angle is 60 degrees.

Is beam angle the edge of all visible light?

No. Some light extends beyond the 50% intensity points. Those points provide a consistent measurement, not a complete outline.

What should I check in a photometric report?

Check the peak intensity, the angles at the 50% points, test distance, measurement method, and intensity curve. A catalogue figure alone is not enough.

How do narrow, medium, and wide beams differ?

Narrow beams are below 20 degrees and create concentrated pools. Medium beams are 20 to 40 degrees. Wide beams exceed 40 degrees and cover broader areas.

Which beam angle suits artwork or a kitchen island?

A narrow beam can highlight artwork, an island, or a textured wall. At a 2.7-metre ceiling, the lit area stays relatively small. Spacing matters.

Why might two downlights with the same beam angle look different?

Reflector design, trim, lens, and light distribution can change the result. An asymmetric beam may also have different left and right boundaries.

How can I check a layout before ordering several fittings?

Try one fitting in the intended room. Check its position after dark, especially near walls or eye level. A tidy specification sheet cannot show every effect. I would still review the layout; the first attempt may need changing.

Conclusion

Choosing the right beam angle for a downlight starts with understanding how it is measured. Beam angle is the full angle between the points where light intensity falls to 50% of its peak value. Downlights are commonly grouped into narrow beams below 20 degrees, medium beams from 20 to 40 degrees, and wide beams above 40 degrees. Narrow beams concentrate light on a smaller area, while wider beams spread it more broadly. The best option depends on the intended use, ceiling height, and target illuminance, measured in lux.

To estimate the illuminated area, use the beam diameter formula: 2 × mounting height × tan(beam angle ÷ 2). This provides a practical starting point for spacing and coverage, though room finishes and fixture placement can affect the result. When comparing China-made downlights, review their IES or LDT photometric files to check the light distribution and confirm that the beam angle and illuminance suit the project. These steps make it easier to determine how to choose the right beam angle for downlights.

Isabella

Isabella

Isabella is a dedicated marketing professional with a sharp focus on driving brand growth and engagement through strategic content creation. With an extensive background in digital marketing, she combines her passion for storytelling with her keen understanding of industry trends to deliver......